Hey there, everyone! I’m Xander Process and I’m here to teach you about basic stitches, with the help of my volunteer patients.
Our first step is going to be setting our patient out on the table. Make sure you have a clean working area.
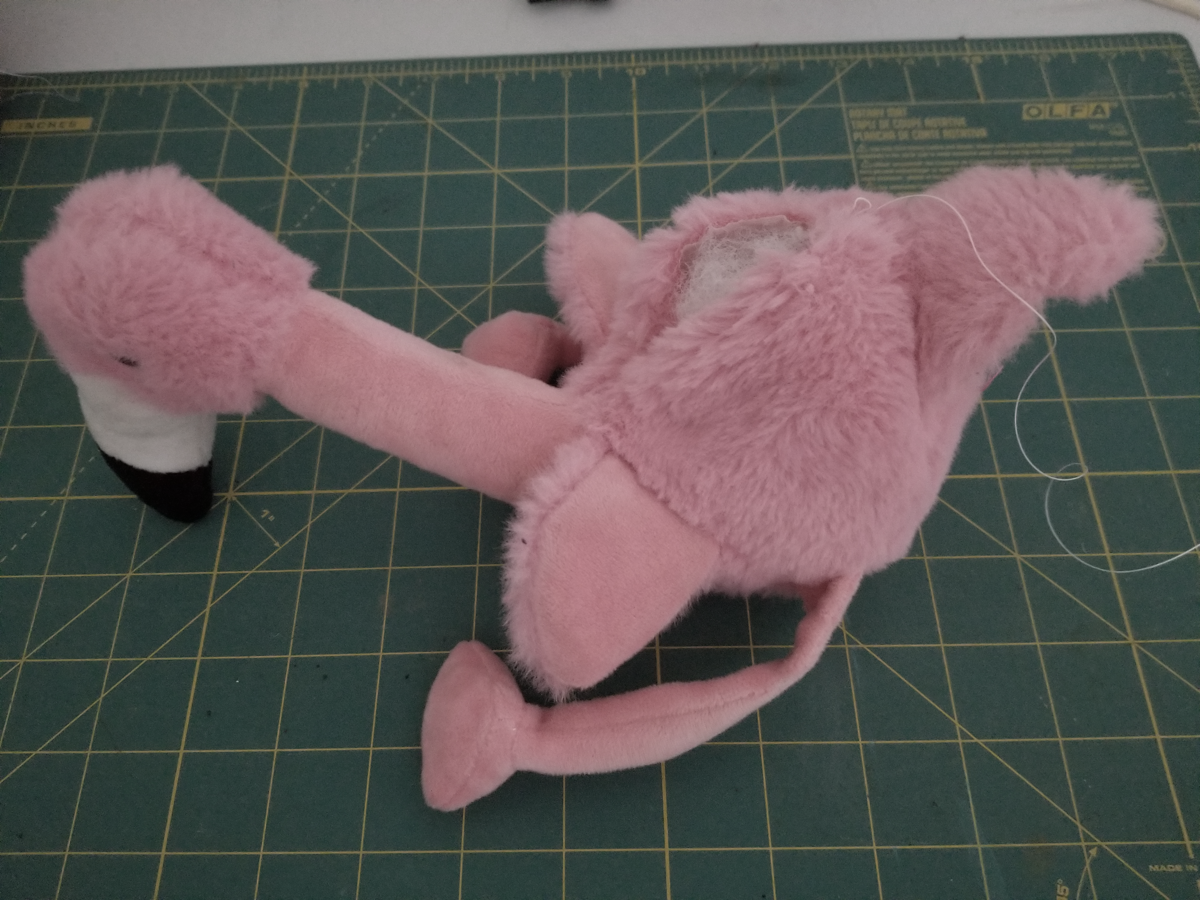
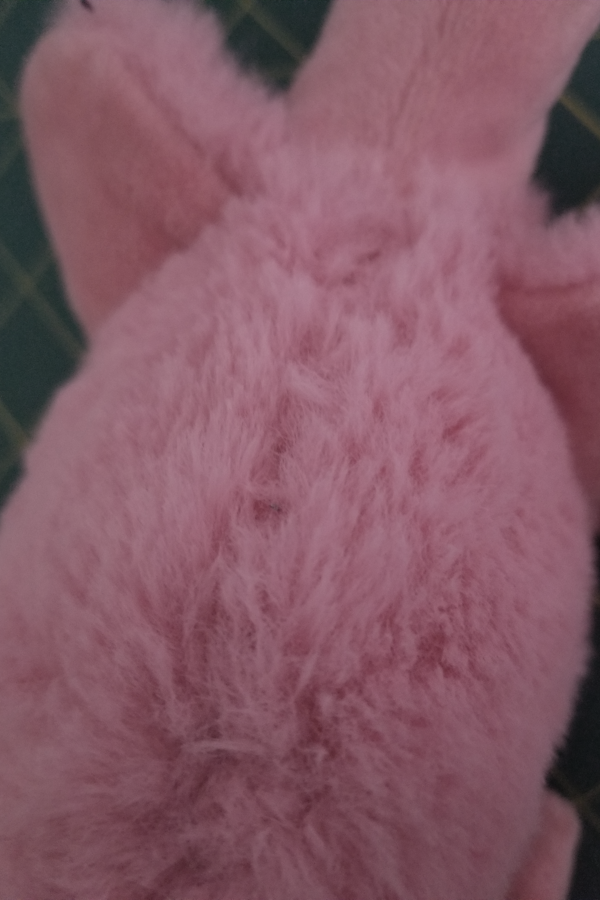
Our first visitor is this lovely Flamingo, who has checked in for complaints about a bad back. No kidding! This guy has a hole I could stick my fist into, the poor thing.
When dealing with an open hole like this, it’s a good opportunity to decide if you want to adjust the stuffing. Flamingo’s neck bone was a bit misaligned, so I put some more padding in to keep it in place. Once we’ve done anything we need to do with the inside of the body, we can start the surgery.
To thread the needle, first you’ll want to trim the end of the thread that you’ll be inserting into the eye. It’ll be easier if you cut the thread at a 45-degree angle to make a sharpened point, then roll it between your fingers to smooth the fibers. Now, obviously, do your best to put the thread through the eye of the needle.
If it’s not working out for you, you can try wetting the end of the thread, either with water or your own spit (I won’t tell anyone) – this will get the fibers even tighter. And if that doesn’t work, you can get a needle threader, which should solve your problems forever. I don’t have one because I’m very cool and good at this.
Make your knot of choice (you’re on your own here) at the other end of your thread, and insert the needle from the interior to the exterior, so that the knot will remain hidden away inside of the patient. I, personally, just tie a knot by doing a few blanket stitches on the inside.
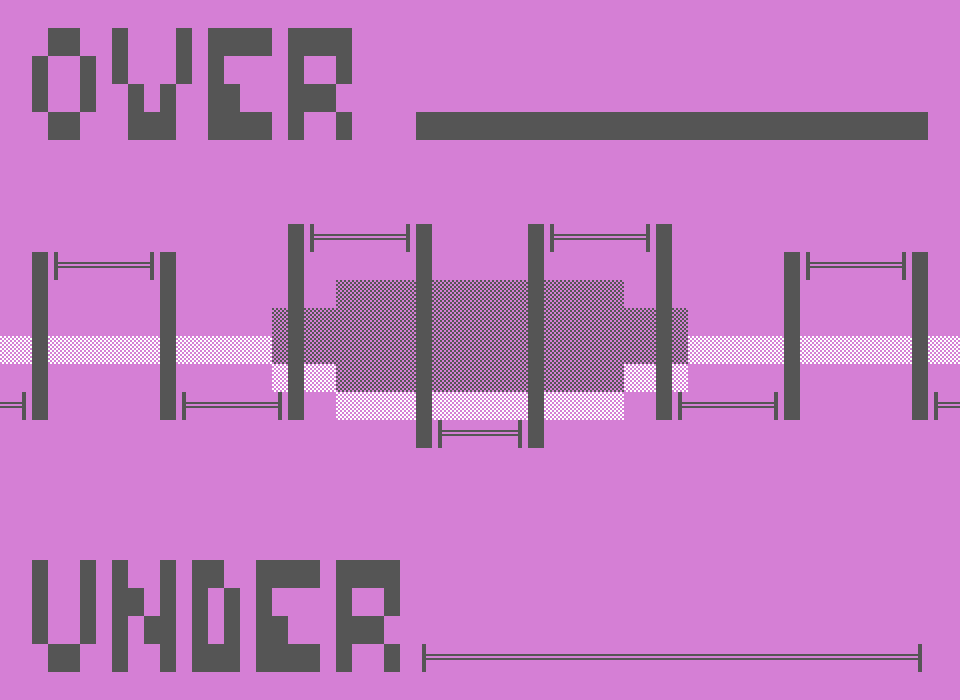
Now that our thread is secured, what we’re going to do now is a ladder stitch. The graphic might look intimidating, but it’s really simple once you’re doing it. Essentially, you make a straight stitch on the inside edge, perpendicular to the hole. Then once the needle comes outside, you cross it over to the other side of the hole, and make another straight stitch there, and so on and so forth. This makes the ‘ladder’.
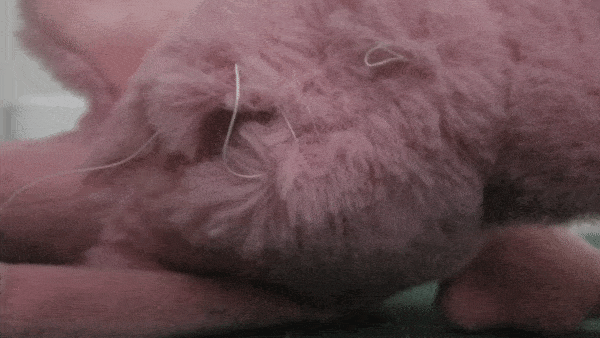
Now just pull the thread tight, and it’s practically invisible! I tie off the end with a few more blanket stitches for security, and then I’m done.
In order to finish the final stitch, I run the needle all the way through to another side of the patient, and then pull it as tight as I can. Then I clip the thread, and once the tension releases, the thread will disappear inside.
There you go!
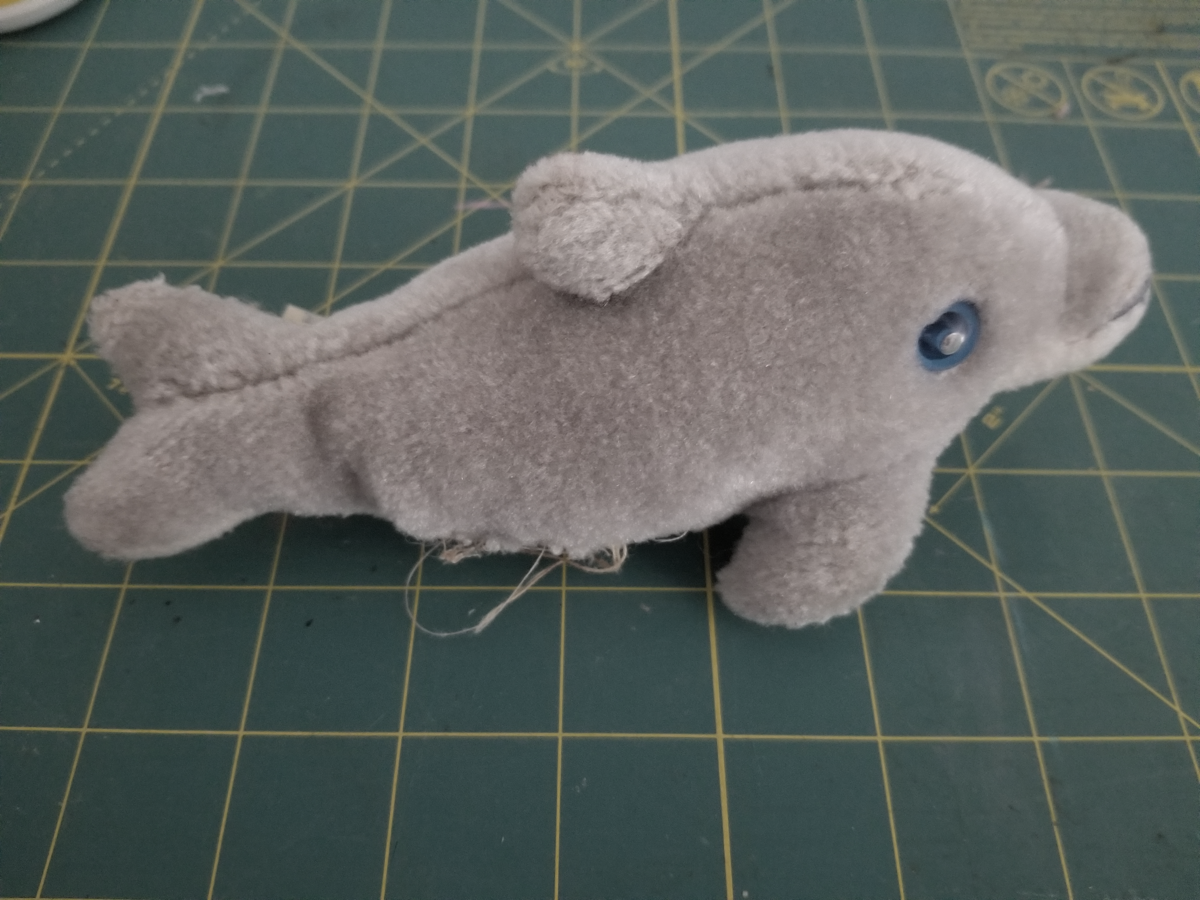
Up next we have the adorable Dolphin, who is here to ask about their side stitch.
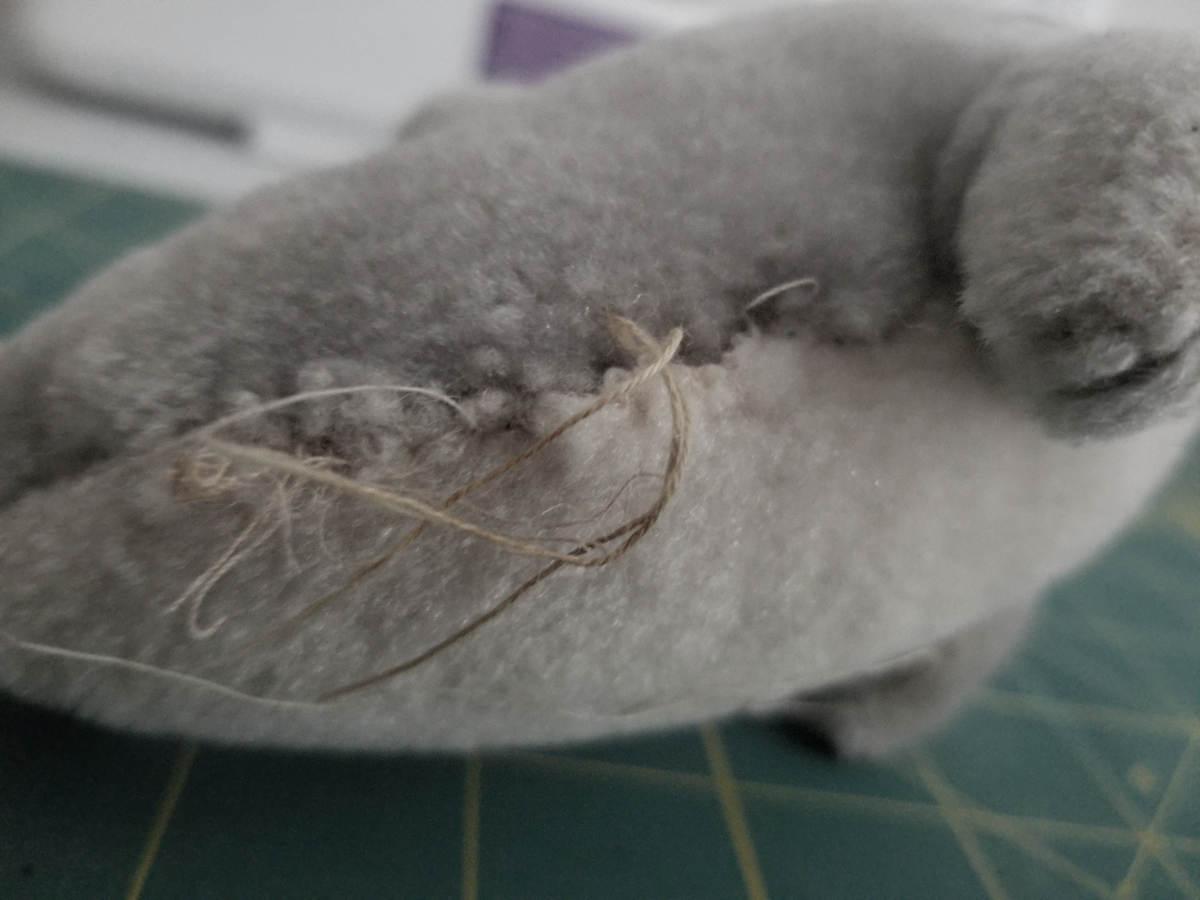
As you can see, Dolphin has been operated on before – but their side stitches are so old and fraying, they’re practically rotten from exposure to the elements. Whoever did these clearly didn’t know their basic stitches! And, hopefully, this shows you how vital ladder stitch is for a long-lasting mend.
You’ll want to take the nasty stitches out with a seam ripper, using the tip of the tool to pull the thread upward and onto the cutting edge. If you don’t have a seam ripper, you can use a pair of really small scissors and your sewing needle, if you’re really careful.
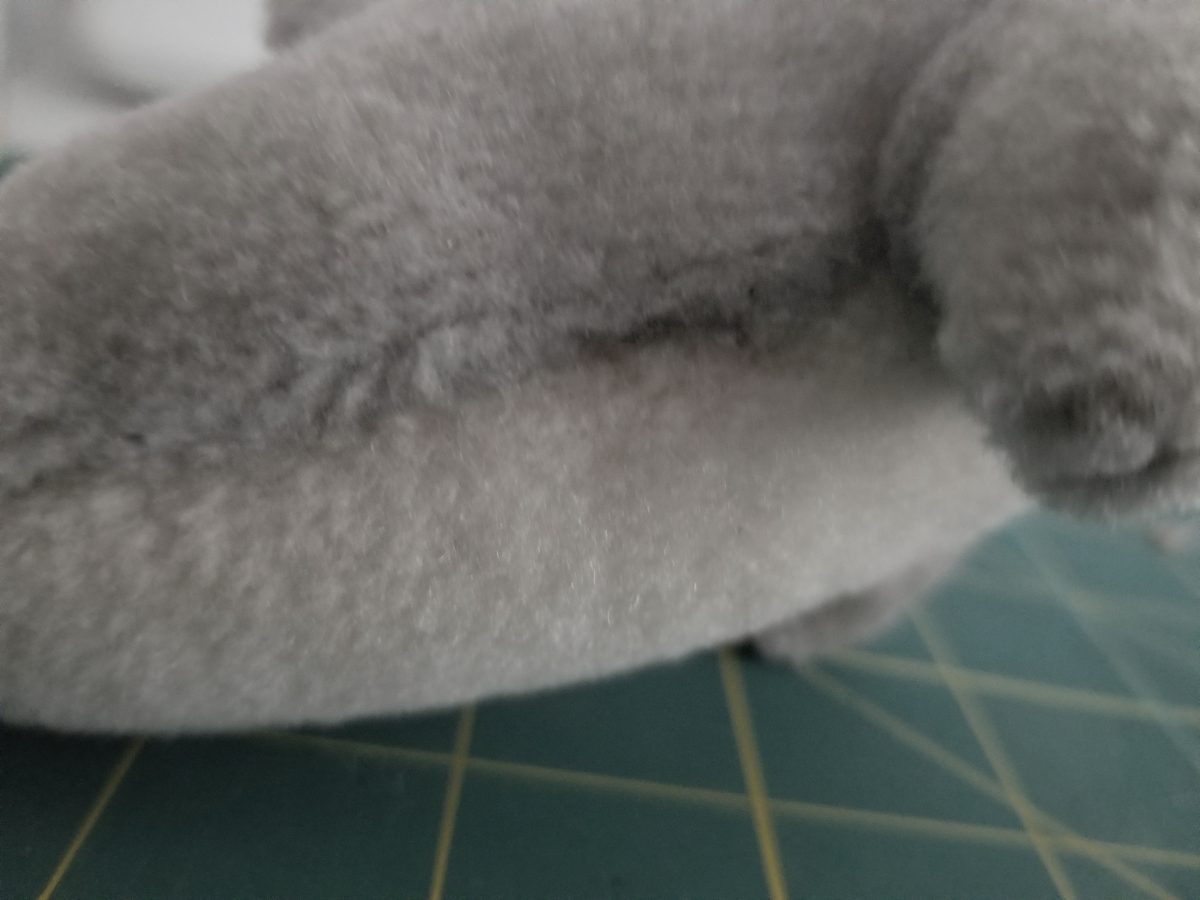
Once you’ve removed all the crud, you can stitch your patient back up good as new.
All better!
Thanks for attending my workshop! There’s cupcakes out in the reception area.